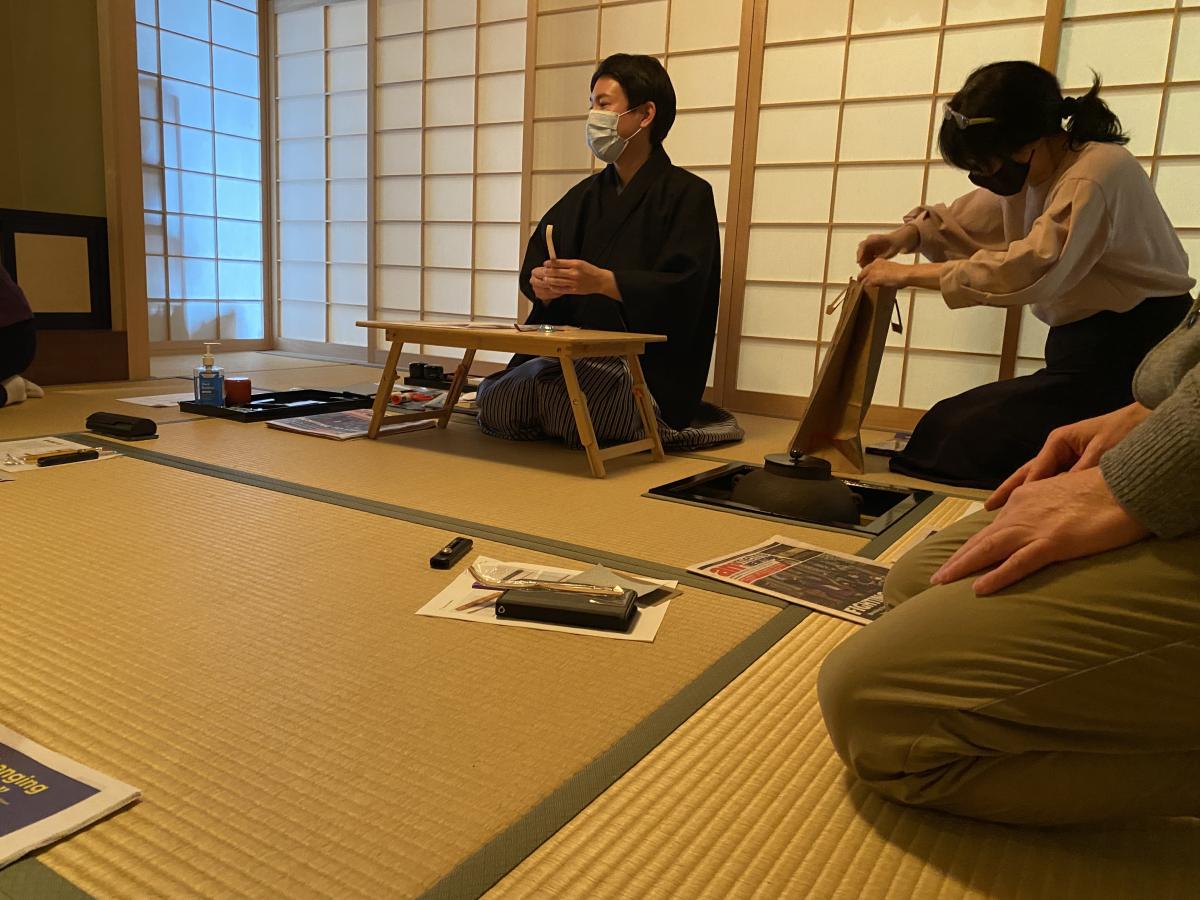
One of the perks of living in a place like New York City is access to a very wide range of people and experiences. This last weekend I was able to enjoy just such an experience - a four hour class on carving traditional Japanese bamboo matcha (powdered green tea) scoops, or chashaku.
The class was led by a master of the Japanese tea ceremony, Nagano Yoshitsugu, and that is who carves tea scoops, the tea masters themselves. Having lived in Japan for 5 years and getting more into spoon carving of late, I really enjoyed this class and wanted to share a bit with whoever might be interested in a glimpse into a very specific and unique example of working with wood!
A quick history of the tea ceremony in Japan
Matcha was introduced to Japan from China in the 12th century. At that time, green tea was seen primarily as medicinal, and so they used medicine spoons made from tortoise shell and ivory for tea. In the 15th century, a man named Murata Juko is credited with creating the traditional Japanese tea ceremony. It is at this time that disposable chashaku were first made. Simply carved, they were finished with a traditional Japanese lacquer, and were often but not always made from bamboo.
A more naturalistic chashaku, carved from sakura (cherry blossom) wood.
In the 16th century, the revered tea master Sen no Rikyu created a new version of the chashaku incorporating an arigoshi, or “ant’s back” hump in the middle of the scoop as a key design. This became a key characteristic in most chashaku to this day, and so many people wanted a Rikyu chashaku that they started to become less disposable at this time. Finally, tea masters in the 17th century started carving chashaku in what is the contemporary style. They stopped applying a finish to them, opting for a more natural look and feel (as is common with most Japanese woodworking in general). This period also marked the change to chashaku as valuable objects to be kept and saved - scoops now were given names upon carving, and kept in handmade boxes bearing their name and the name of those who carved them.
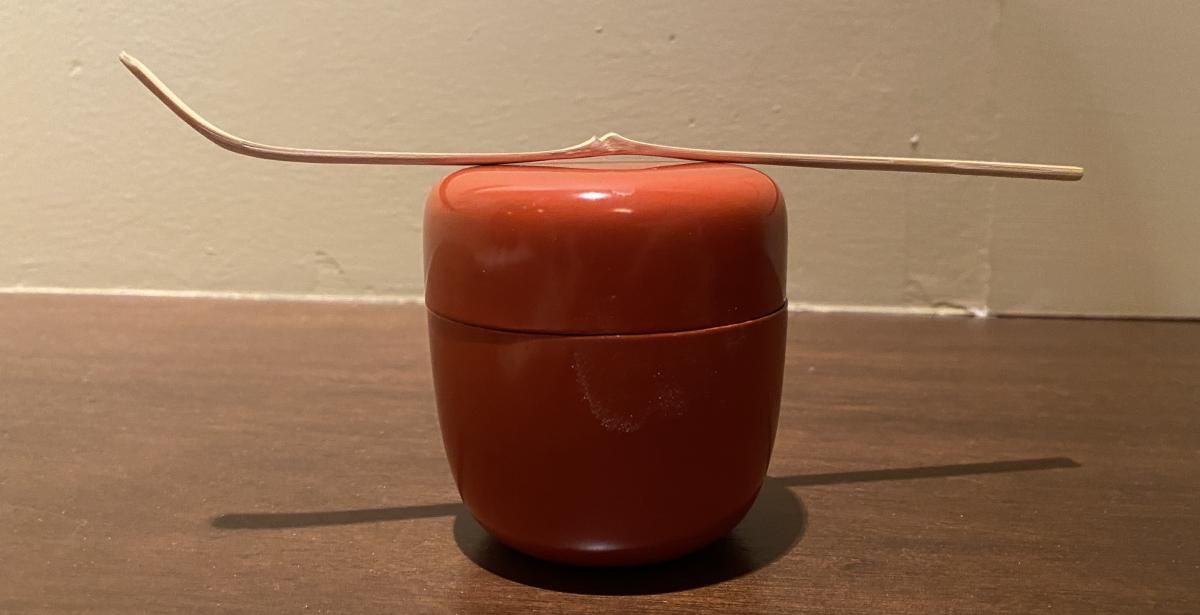
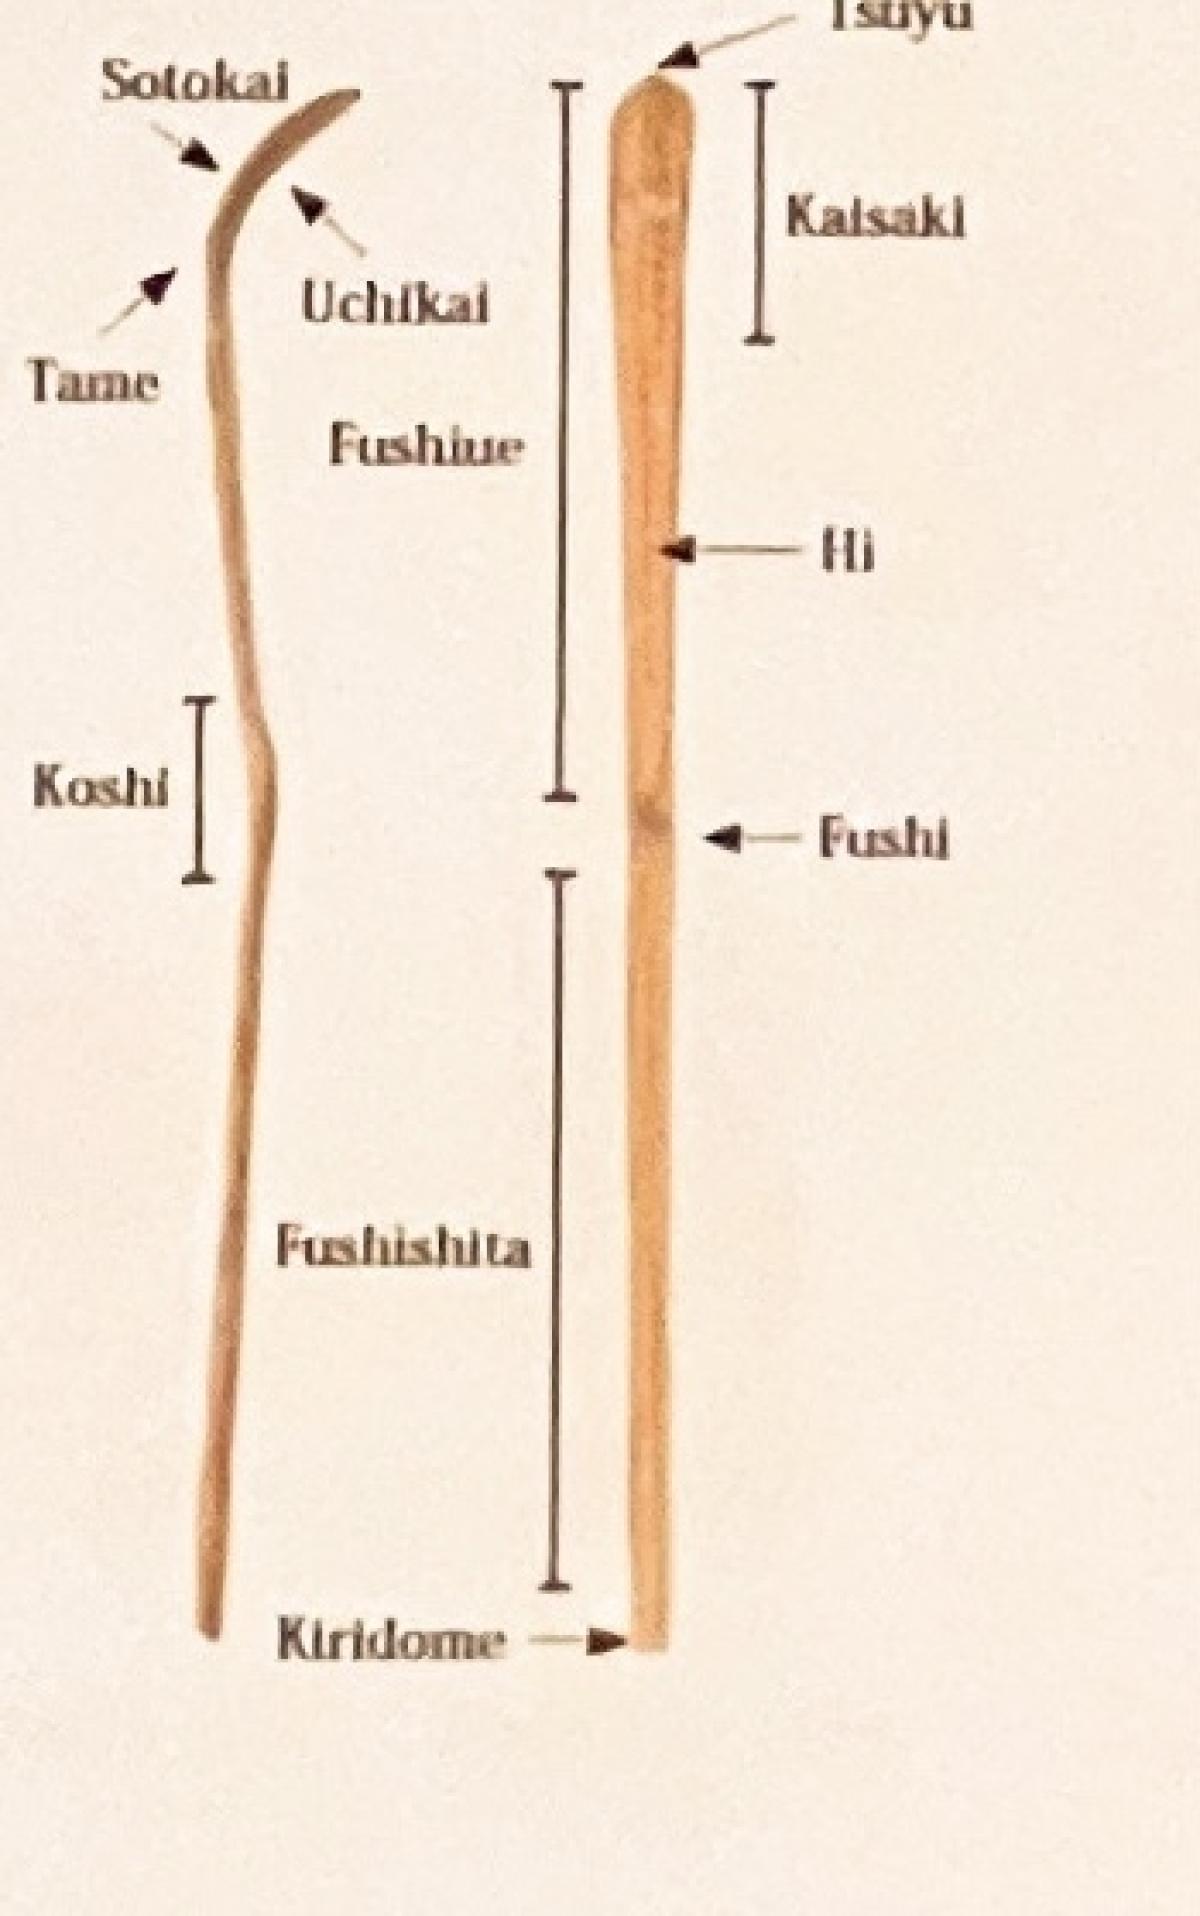
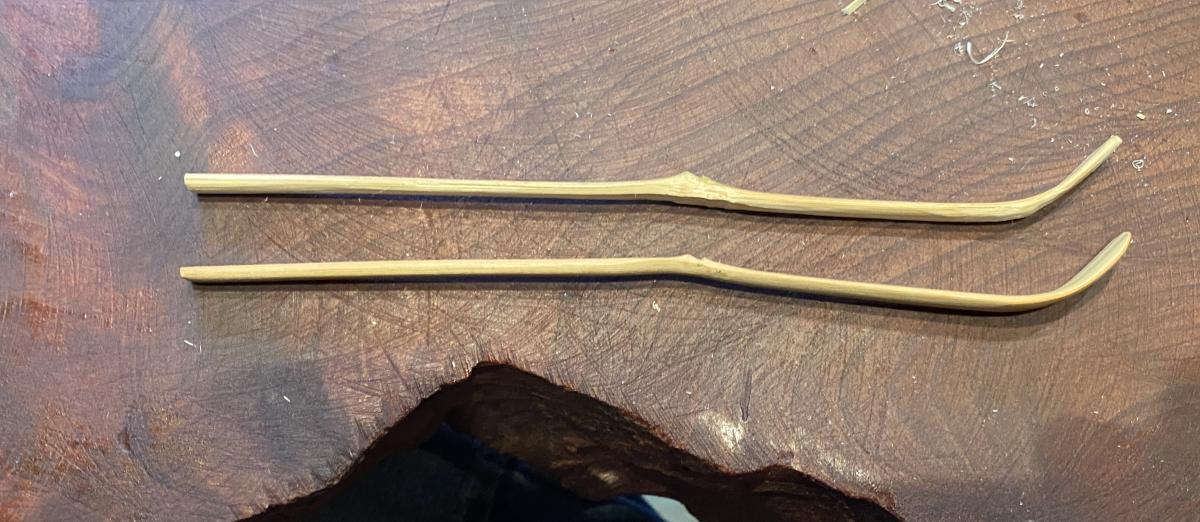
The carved rise in the middle of the chashaku is the arigoshi, helping it to balance on the powdered tea container, or natsume. When natural light hits the tearoom, you should be able to see light coming underneath the rise, giving the sense of a mountain.
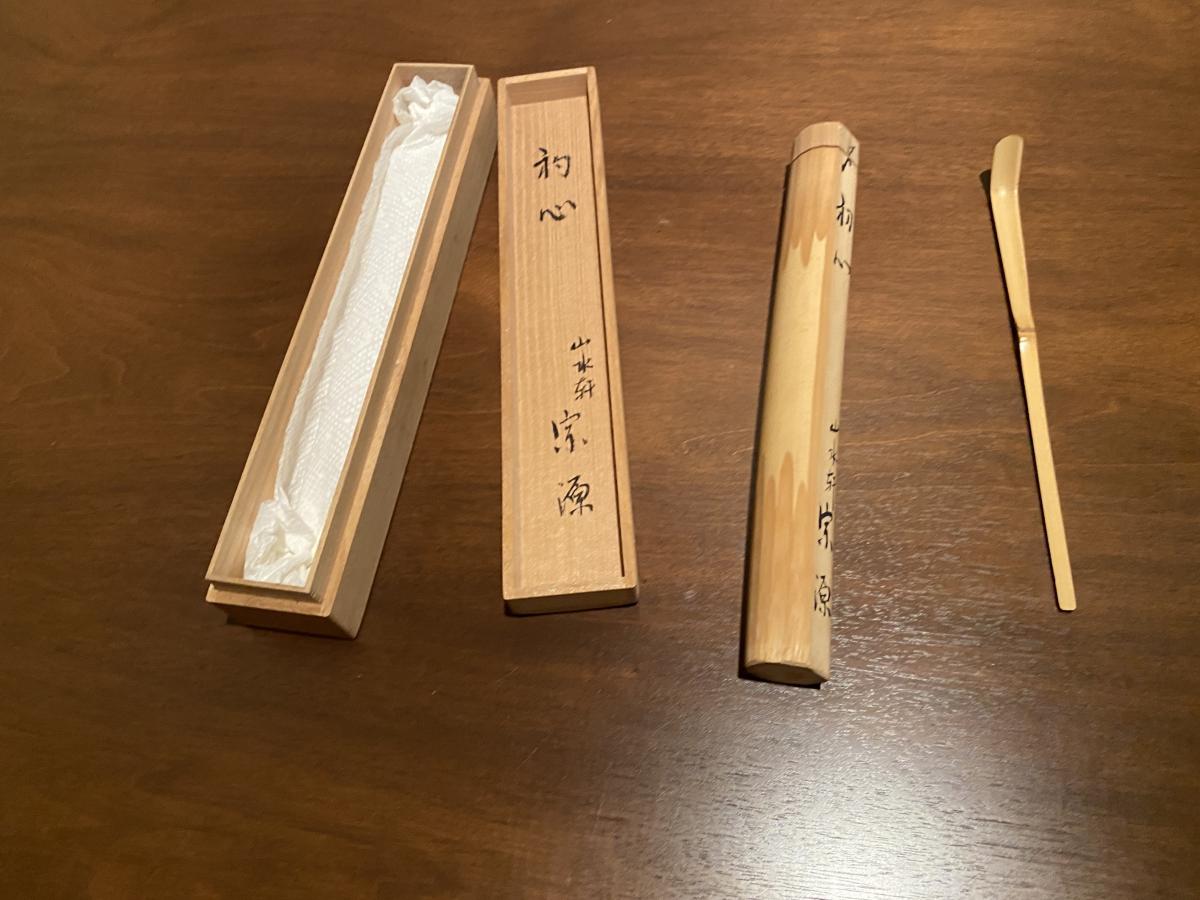
Chashaku on the right, inner box in the middle, outer box on the right.
Chashaku Dimensions and Design
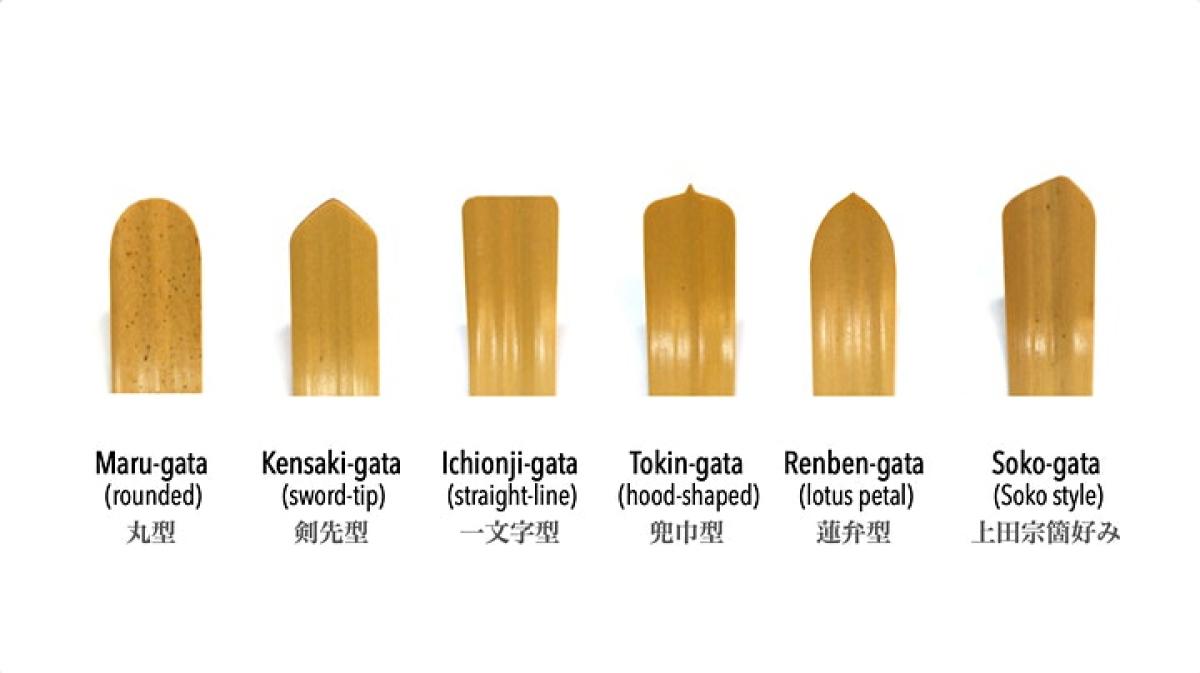
The standard chashaku is 185 mm long, with a width that tapers from 10 mm at the head to 5 mm at the bottom. They are usually carved pretty thin, taking material off the back, and there are a number of different standard designs for the scoops as you can see below. Interestingly, the different head styles correspond to different schools of tea ceremony.
Carving the chashaku
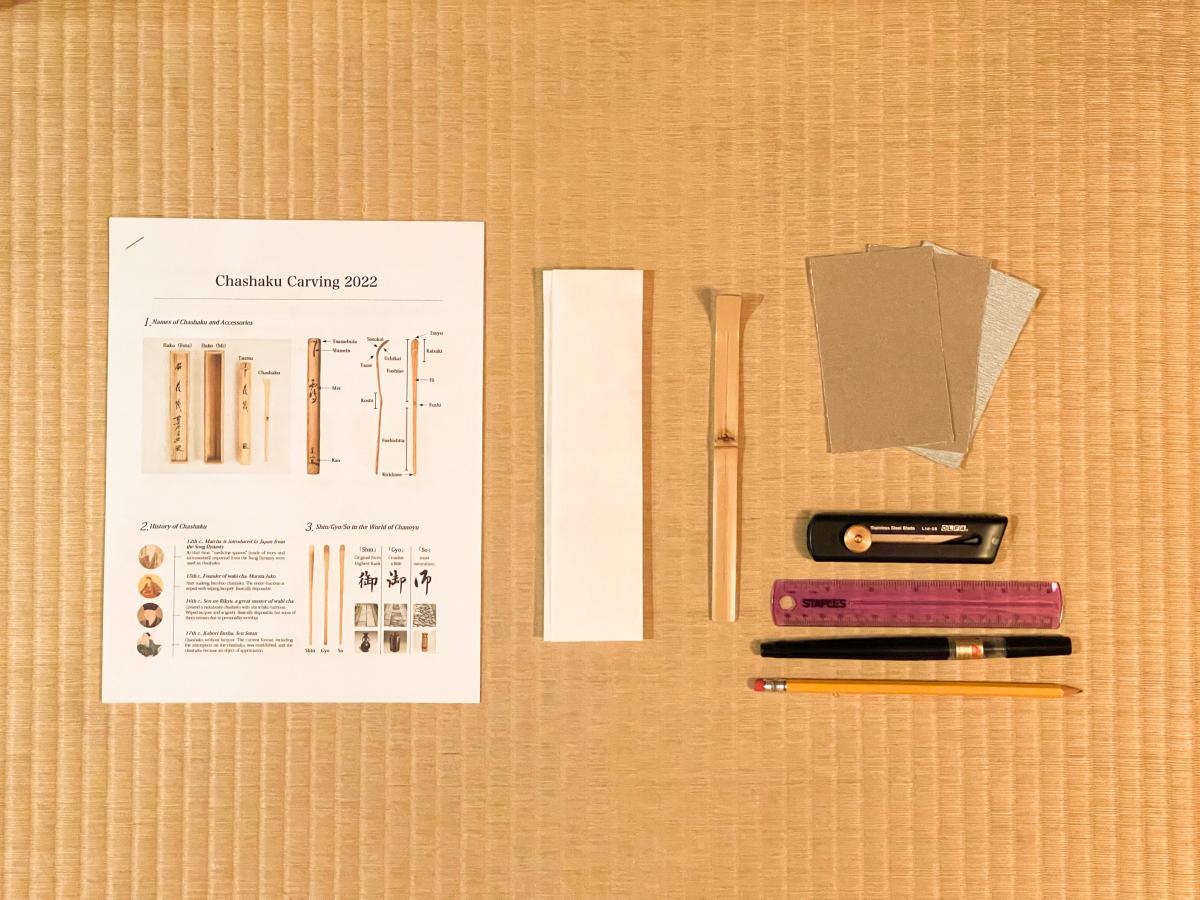
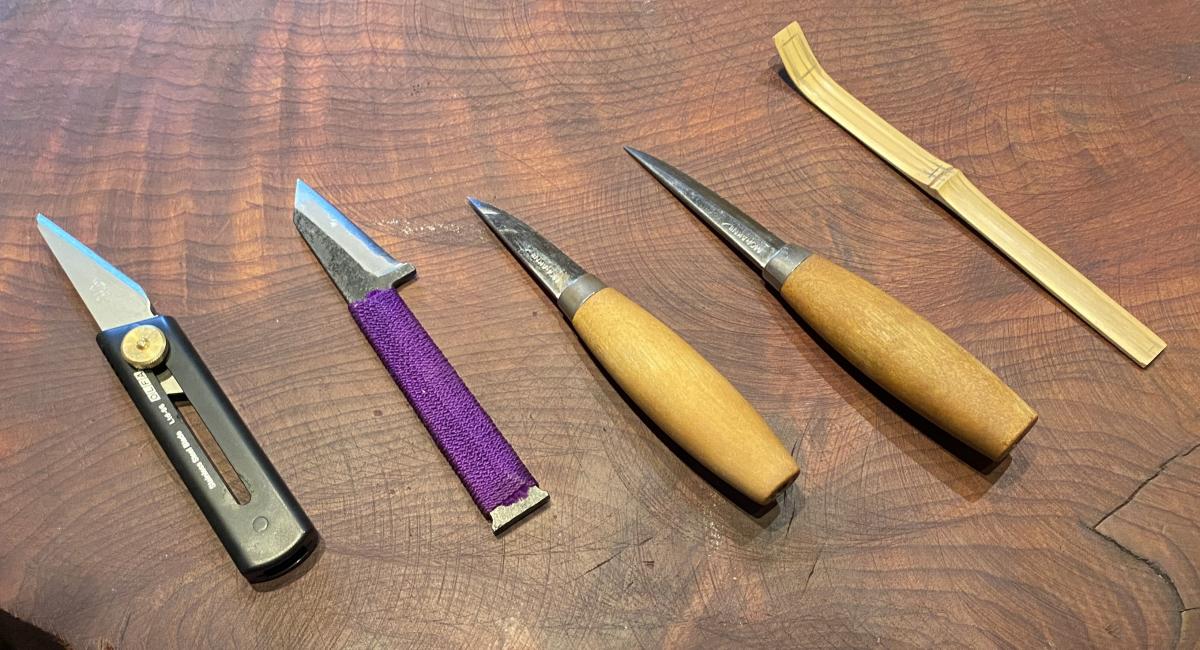
Carving this piece is pretty straightforward. For this class we were given the following:
Craft carving knife
Bamboo blank
Sandpaper (220 and 400 grit)
Pencil and rule for layout
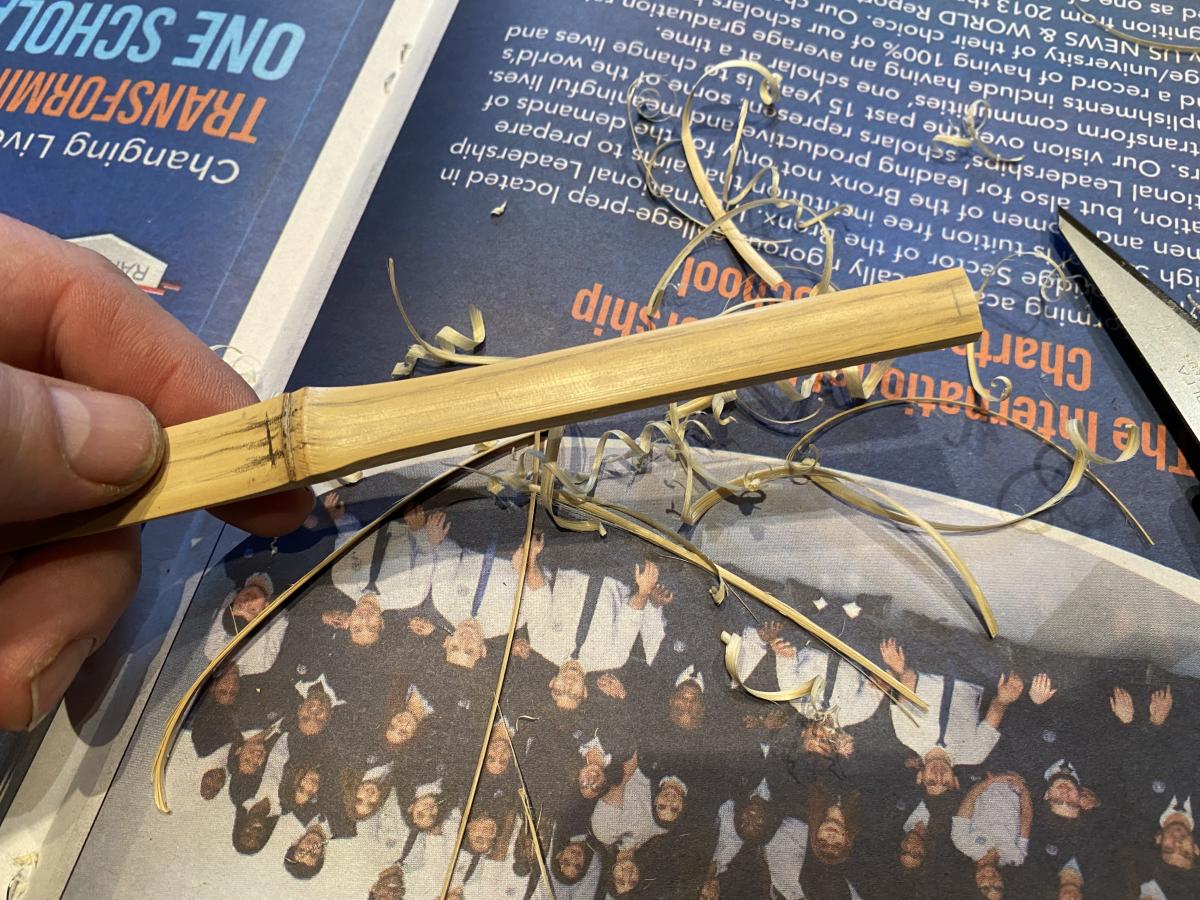
The first step in carving is marking the outline of your scoop on the face of the blank. You do not sand or carve the face, and so make sure that you don’t use anything indelible to mark with! We used pencils and sketched out the dimensions above. Then it is simply a matter of taking down the sides to the correct width - it is easiest to start at the head/thick end and work down to the thin end to avoid overcarving anywhere (which we all did on our first attempts). Bamboo is very straight-grained and easy to carve, also making it easy to potentially blow out areas you did not want to remove.
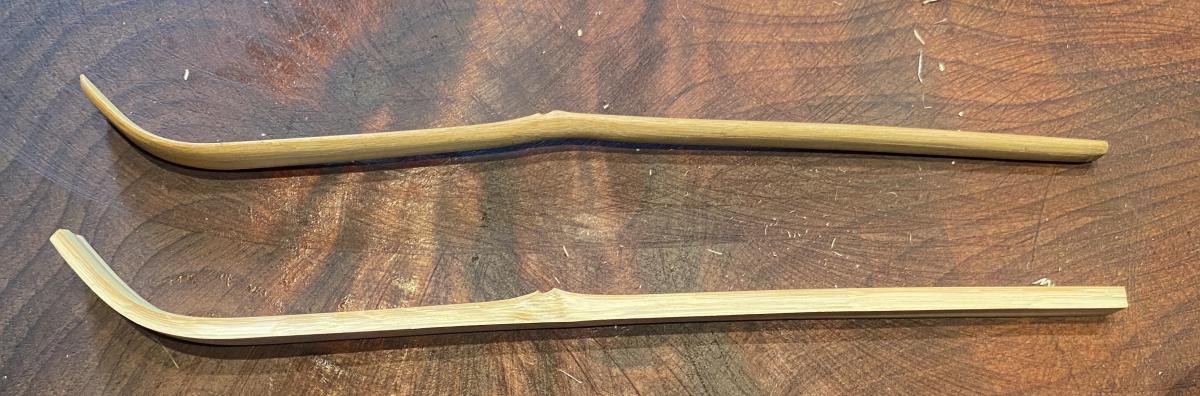
And so it begins, a finished sample from the instructor no top, and my blank ready to go on the bottom.
In the beginning, I made simple push cuts using my thumb to carefully guide the knife through the bamboo as instructed, which worked well (most of the folks there had no background whatsoever in working with wood, and so I was in the rare setting where I knew more than most).
A work in progress, taking down the sides one stroke at a time. I set up a pattern of taking 3 strokes off one side and then the other, to keep it as balanced and symmetrical as possible.
After a while I experimented with using different knives I had brought and a variety of cuts. What wound up working best for me (most efficient and best control) was my straight Morakniv sloyd knife, and using a chest lever grip. That might sound fancy, but it is a common carving technique, where you anchor your hands against your upper chest and use your chest and back as a fulcrum to make clean long cuts.
I played around with different knives, having never worked with bamboo before.
Once you have a width you like, you thin and round out the back of the scoop (sotokai), making sure to get it as thin as possible without it being breakable. At this point you can hollow out the back (fushi) to create the mountain shape, or arigoshi, if you choose to. I gave it a shot, taking just a little bit extra in that area.
Starting to thin out the back, mine on top. A sample finished scoop on the bottom. You can see how thinning out the back of the head of the scoop (right side) was not so easy to get clean. It took practice.
Once you have the width and the back finished, you can start to shape the head to match one of the traditional designs above or whatever shape you like. This is done after thinning the back out, which makes it easier to do.
After you have finished that, we come to two of the more uniquely Japanese steps of carving a chashaku, at least in my experience - the final cut and the naming.
The final cut is a 45 degree cut on the bottom back of the scoop, starting a few millimeters up and angled towards the very bottom. A small cut that must be accomplished in one stroke. If you mess it up it stays as is, there is no correcting or cleaning up. This cut gives life to the chashaku, as our instructor explained to us - tamashii wo ireru - introduces the soul into the scoop. Fun stuff, no pressure on the cut at all! Of course, I did not have pretty soul cuts on the scoops I carved, and it was very difficult for me to not clean them up (still now, a few days later). But so far I have resisted the urge…
That cut is the end of the carving - we did have sandpaper to smooth out our scoops but traditionally they are not sanded, but finished solely with knife cuts.
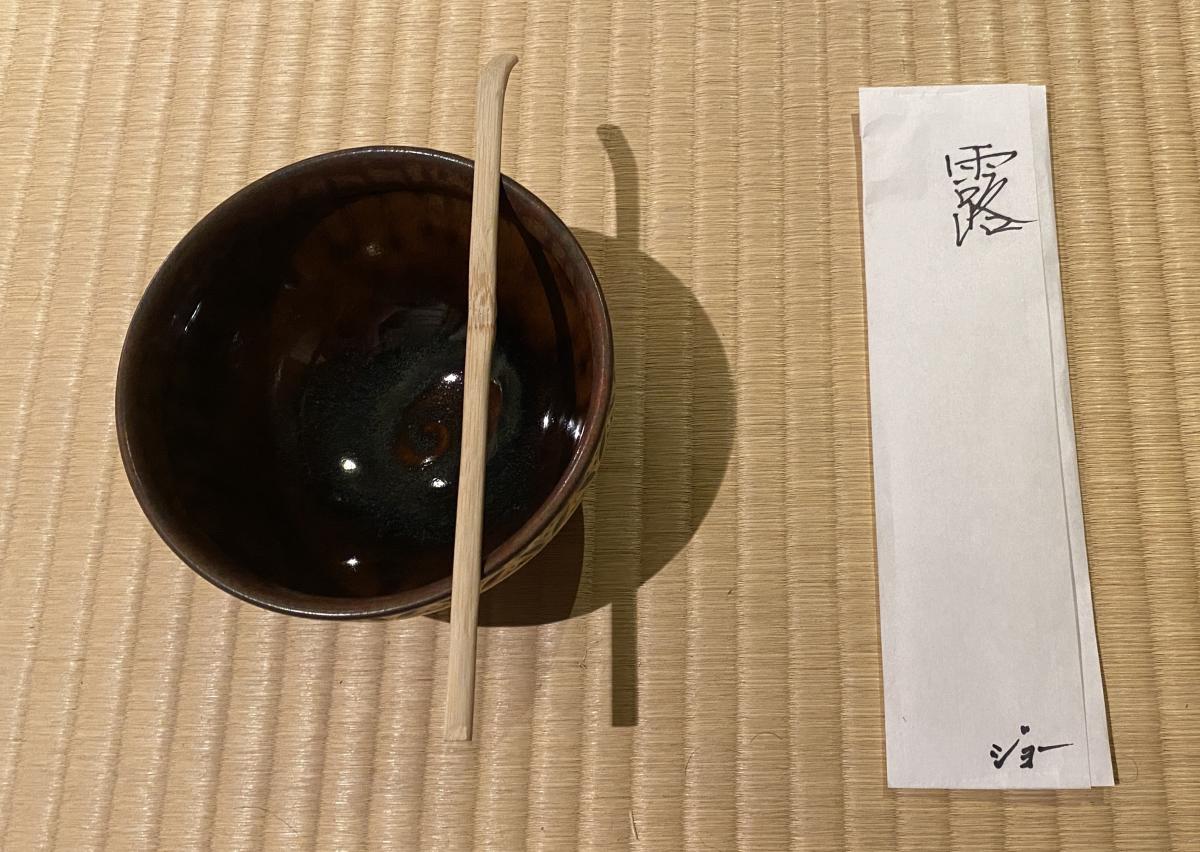
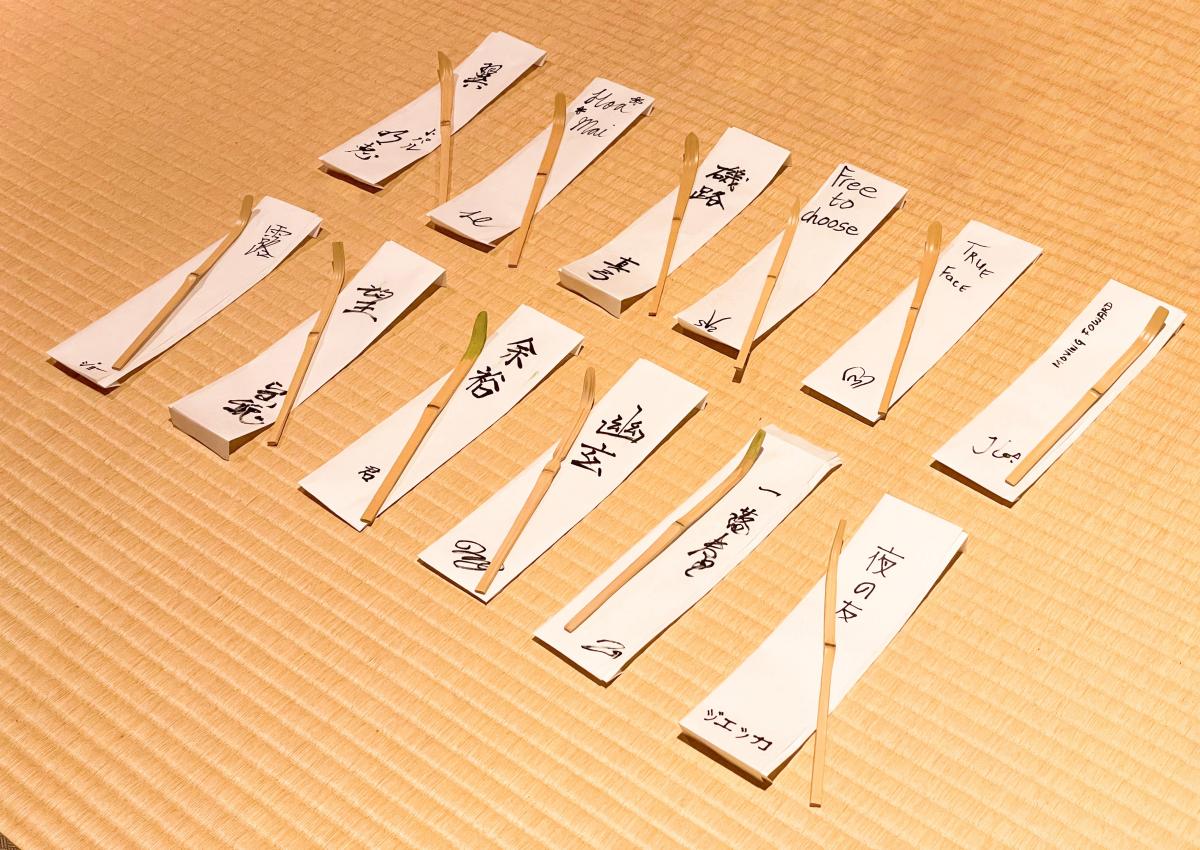
Lastly we named our chashaku.
The final product, waiting to be used!
We were instructed to think of a name as we carved, traditionally this might be something seasonal, something from a poem or song. For this class we were allowed to use whatever name we wanted, and while traditionally the name would then be written on the outer boxes, since we did not make boxes we wrote them instead on the paper envelopes we were given. For my scoop I choose the Japanese name tsuyu, meaning “dew” in Japanese. It is the first word from a traditional Japanese haiku poem I love. And being my first scoop ever, the idea of the morning dew felt like a nice beginning, and the character is written at the top of my envelope. At the bottom is my name Joe written phonetically in Japanese.
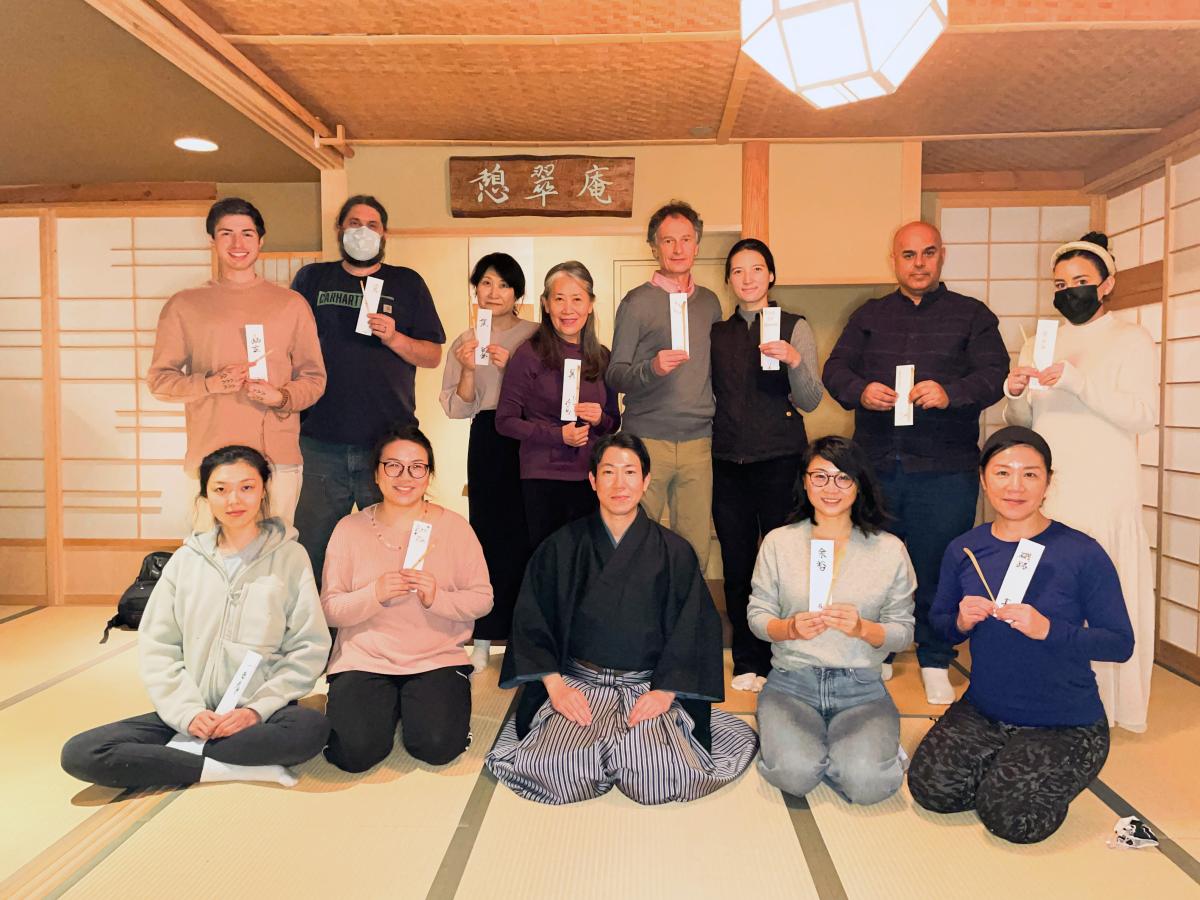
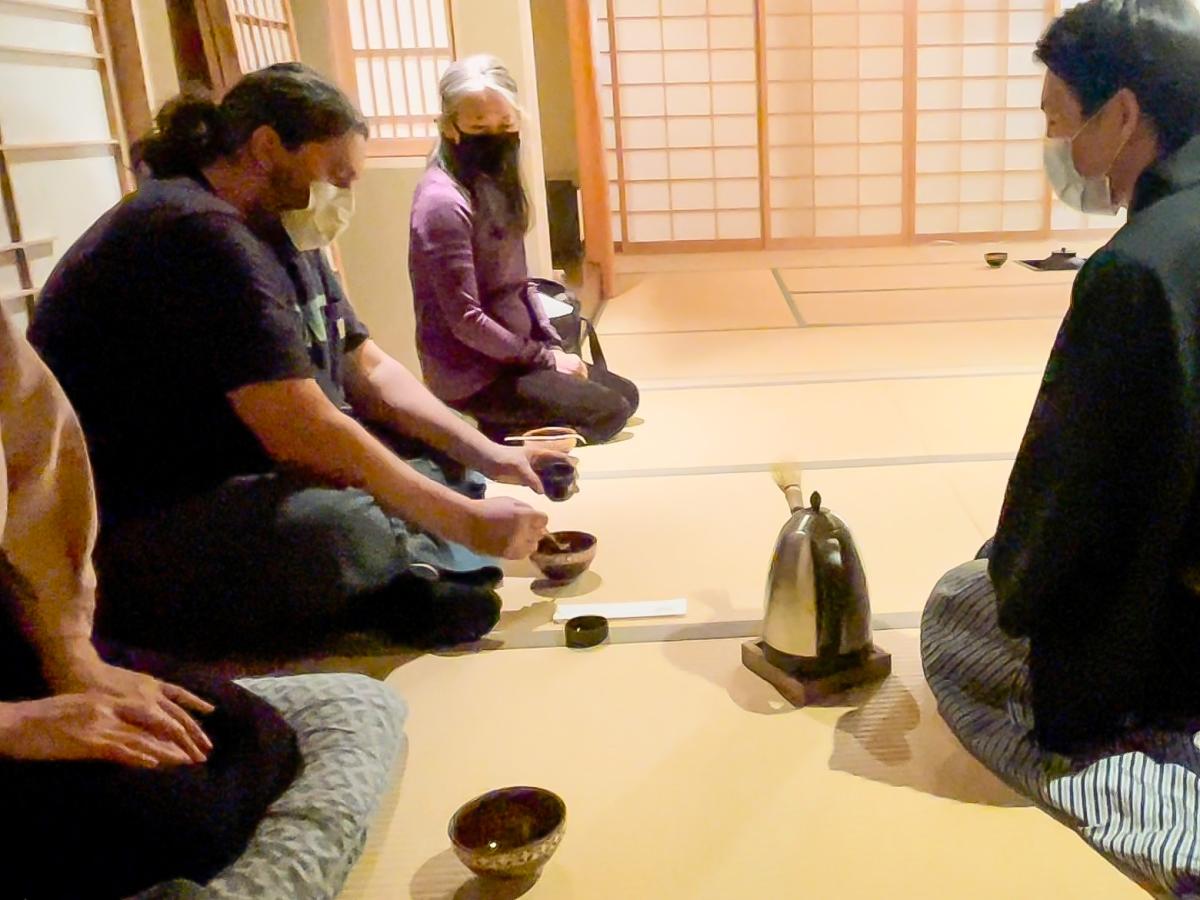
Class finished with us all presenting our chashaku and names, and our instructor making tea for us using our scoops.
Join the conversation
03/03/2022 Rita
Thank you, the cultural information is very interesting. And the carving project is one that any carver can do.
03/09/2022 Joe Samalin
Thanks Rita! I had a lot of fun in the class. And I am going to be making a bunch of these as spice scoops for cooking (I checked beforehand with the instructor to make sure that wouldn't be inappropriate.)
03/17/2022 D. J. Muse
Why are people in the pictures wearing masks? Are they embarassed, and if so, why? So sad. They should be happy..


 Joel's Blog
 Built-It Blog
 Video Roundup
 Classes & Events
 Work Magazine